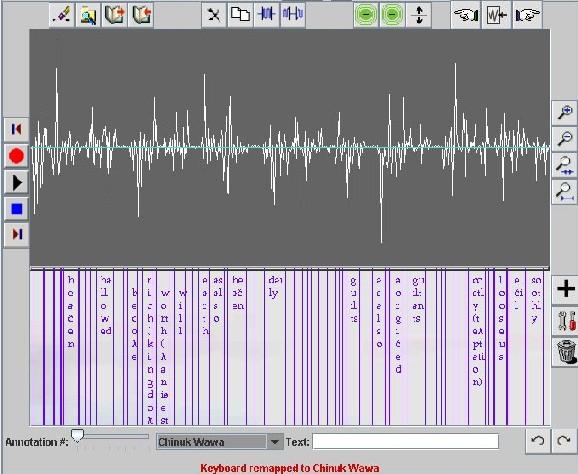
A picture of the annotation panel follows below. In the center of this panel, you see a sound recording displayed at the top, and a series of annotations on the bottom. Sound is vibrations in pressure that travels through space. The top of the page shows these vibrations over time as a person speaks. The purpose of this panel is to be able to attach annotations to differenct places of the recording. There are a series of buttons surrounding the annotation panel. On the bottom there is a slider to the left, a drop down menu in the middle and a text field to the right. There are also undo and redo buttons. We will describe buttons all of the buttons and these functions on linked pages.
 ) you will hear the audio corresponding to the section of the sound
wave that you select.
) you will hear the audio corresponding to the section of the sound
wave that you select.
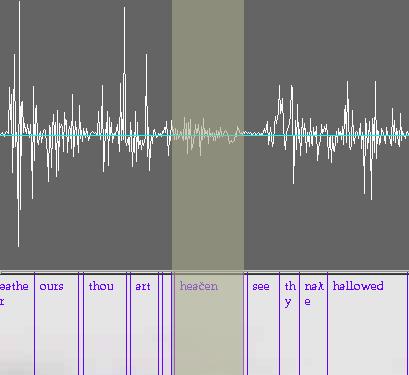
The picture below shows a portion of the panel that is selected. Notice that the highlighted area is shaded. If you click the mouse again the selection is released.
The selection below shows the portion of the sound wave where the word, 'heaven' is spoken in the recording. Note the alphabet is not standard in this example. It shows the chinook wawa font. We'll discuss how you can map keyboards for your native alphabet below.
Notice that some of the annotations don't fit within their selected areas. For example in the screen shot, the word, 'thy,' is too wide for the portion of the recording that refers to it. In this case, the program displays the word vertically. The 'th' fits on the first line, and the 'y' displays on the second.
If you make a mistake, error messages display in red at the bottom of the panel. Sometimes ACORNS acknowledges what it is doing by displaying a message in this area. The Error page describes the kind of messages that can display.
While the Sound Editor executes, you move your mouse over the various buttons, text boxes, or drop down menu, to see a short description of the component. This can help if you forget what a particular component does. We have help pages that describe the operation of of the various buttons. You can click on the image links below to learn how these buttons and controls work.
| Recording Buttons |


|
| File Control Buttons |


|
| Edit Buttons |


|
| Recording Speed and Volume Control Buttons |


|
| Zoom Control Buttons |


|
| Redo and Undo Buttons |


|
| Keyboard Controls |

|
| Selection Control Buttons |


|
| Annotation Controls |


|