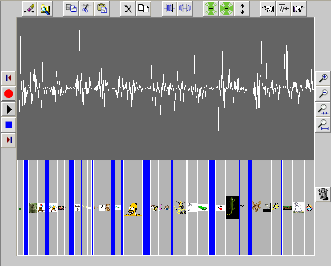
A picture of the annotation panel follows below. In the center of this panel, you see a sound recording displayed visually. At the bottom, there is a series of annotations.
Sound is vibrations in pressure that travels through space. The wavy line displays these vibrations over time as a person speaks. The purpose of this panel is to be able to attach picture annotations to differenct places of the recording. There are a series of buttons surrounding the annotation panel. We will describe buttons all of the buttons and these functions on linked pages.
 ) you will hear the audio corresponding to the section of the
sound wave that you select.
) you will hear the audio corresponding to the section of the
sound wave that you select.
The picture below shows a portion of the panel that is selected. Notice that the highlighted area is shaded. If you click the mouse again the selection is released.
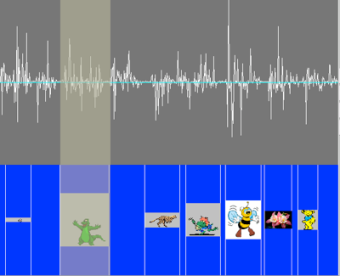
The selection shows the portion of the sound wave where the story is speaking about a green animated figure. It shows the green animated figure attached to that portion of the sound wave. To attach a picture in this way, simply select the appropriate portion of the sound wave, click on the icon with the picture of camera on the ACORNS toolbar(The top toolbar, not the secondary toobar in the lesson setup panel). Use the file dialog box to find the picture you want to attach. There are ACORNS help pages that describe inserting pictures in more detail should the above description be insufficient.
Note that you can also use the insert image procedure to insert a background picture for your lesson. To do this, just click on the camera when you do not have an area of the sound wave selected. ACORNS then assumes that you want to change the background. In the diagram below, the background shows with a blue color.
Should you want to remove a picture annotation, first click somewhere within the picture you want to remove. A vertical line will show after you do this. Then click on the edit toobar at the top of the ACORNS window, then click on delete, and then choose picture. If you click somewhere outside of your picture annotations, ACORNS assumes that you are deleting the background picture.
If you make a mistake, error messages display in red at the bottom of the panel. Sometimes ACORNS acknowledges what it is doing by displaying a message in this area. The Error page describes the kind of messages that can display. You can also undo and redo your last operation (Refer to the ACORNS Redo and Undo page for more information).
While you are setting up a Hear and Click lesson, there are a series of buttons to assist. As you move your mouse over the various buttons, you will see a short description of the component. This can help if you forget what a particular component does. We have help pages that describe the operation of of the various buttons. You can click on the image links below to learn how these buttons and controls work.
| Recording Buttons |


|
| File Control Buttons |


|
| Edit Buttons |


|
| Recording Speed and Volume Control Buttons |


|
| Zoom Control Buttons |


|
| Selection Control Buttons |


|
| After clicking within a picture,
click on this button. The picture will be removed. |
 |